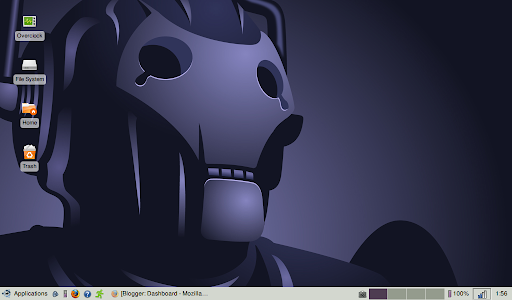
Once again, I start this post with a note of caution: If you're not a nerd, or an Asus Eee PC user, then don't read any further.
Also, this is Part 2.
Part 1 is here.
The question is how did I get things running relatively smoothly on the Eee PC?
The answer to this is, I really have no idea. I'll be honest, I really don't know the first thing about Linux, or much about computers generally at all. But I do remember most of the sequence that it took me to get all this right.
It all starts here.
EeeXubuntu has had three releases over a short period of time. The last one was in December 2007, but it should be noted that this shouldn't prevent you from having a reasonably useful experience.
And as we go through this, you'll see that it becomes less and less important that the initial install is based on Xubuntu 7.10 (Gutsy Gibbon). We'll walk through the upgrade to 8.04 (Hardy Heron) when we get to it.
For this operation, you will need the following:
1 blank CD-R
1 blank CD-RW - recommended
1 USB stick of 1 GB or bigger
1 ethernet connection to your router
1 Asus Eee PC 900 - no idea if this will work for any other model
1 Desktop with internet connection
Warning: I am not a technically-minded dude. Some of this could potentially fuck your shiny new Eee PC. Read the pages I refer to and decide for yourself before going ahead with this, as what worked for me may not necessarily work for you.
As best as I can remember, this is what I did:
1. Download your EeeXubuntu ISO and burn it to a CD-R
At the EeeUser.com wiki, there is a comprehensive guide to this. Release 3 appears to be OK, but it was back in December. Is there a Release 4 beta for the adventurous? I can't see it anywhere, but I used Release 3, and it appeared to work OK for me.I used the torrent available through The Pirate Bay - it's fast.
Burning it to a CD-RW first will ensure that you don't create another coaster - but it's suggested that you copy it over to a CD-R to create a traditional boot CD.
2. Use your freshly burnt CD to create your USB installer
Apparently, it's simpler if you plug in an external CD drive into your Eee PC, but I did it the hard way.Boot your desktop using the CD and run 'Start or install Xubuntu' at the main menu. Note that you're not installing Xubuntu to your desktop, merely running it. As long as you don't double click on the 'Install' icon when the Xubuntu desktop comes up, you'll be AOK.
Now connect your USB stick.
You'll need to run a terminal window in Xubuntu - Applications –> Accessories –> Terminal. Be very careful typing these commands in. The terminal is a powerful tool.
Now you'll need to key in the following command. Or cut and paste - if you use hotkeys, pasting into a terminal window requires Ctrl-Shift-V:
Apparently, your USB stick will be autodetected, and the necessary files will be copied over. Wait until another prompt appears on the screen and then exit.sudo /cdrom/mkusbinstall.sh --autodetect
You can now power off your PC. The CD should eject automatically as you power down.
3. Install on to your Eee
Firstly, ensure that your wireless connection is enabled. It might be a good idea to power it up in Xandros or Windows first to check. Xubuntu apparently will not detect or install wireless if it is not enabled.Plug your USB stick into the Eee, then power up holding down the Esc key while you do it. You'll then be prompted to select the USB stick from a boot selection menu.
When the Xubuntu menu appears, select 'live/eeepc'. It should be chocks away from here.
Follow the steps on this page to install. I installed with a swap partition, but this page will let you know the pros and cons of either.
Once the installation process is complete, reboot and you're away. The wireless should work out of the box, but tonnes of other stuff won't.
If the wireless doesn't work, it's not the end of the world. This page is full of heaps of stuff that will help you get your Eee up and running.
Before you follow the next steps, it's a good idea that you shut down and plug your ethernet cable into your Eee PC. Wireless will walk out the door at some point.
4. Run all updates
This is pretty important. But it does come with a caveat - be careful what you click on here.Running the Update Manager through Applications –> System –> Update Manager will download a lot of stuff to update your system. It will also potentially disable your wireless and do a stack of other things.
You will get prompted in your Update Manager window to upgrade to Xubuntu 8.04 (Hardy Heron). Do not do this just yet. Shut down your system and hook up to your router via ethernet to be on the safe side. You may need to do this in order to get your wireless running again, and other stuff.
5. Upgrade to Xubuntu 8.04 (Hardy Heron)
Apparently this causes problems for most, so much so that upgrading to Hardy is seldom recommended. It didn't cause any for me. But then again, when I found this page, it pretty much sorted everything out for me.The Update Manager should already have a little button in there for you to click to upgrade. Do it. Once done, you'll need to reboot.
There's an optional step in here to enable your wifi - it should have stopped working at this point. If you want to do this now, scroll down to 6A, but steps 7 and 8 will cover this off.
This page here is 24 carat gold for fixing a whole range of stuff on the Eee after upgrading to 8.04. While it relates to a vanilla Ubuntu install, I found that it fixed most of the stuff that needed to be fixed.
6. Correct the shut down glitch
I did this straight away, although one of the following scripts in 7 and 8 might fix it. I don't know. I ran it anyway.Open a terminal window (Applications –> Accessories –> Terminal) and type in the following:
Then, add this line to the end of the script:sudo mousepad /etc/default/halt
This should correct the issue. Something that may be important: When you update a script in Mousepad, ensure that there are a couple of blank lines at the end of the file. This apparently makes the script work better - no idea why.rmmod snd-hda-intel
6A. Enable wireless networking
This is an optional step, obtained from this page. I did it, because I wanted to sit on the sofa while I sorted out the rest, and also because I read it first. The two scripts coming up in 7 and 8 should negate the need to do this bit.Open a terminal window (Applications –> Accessories –> Terminal) and type in the following:
Some of the lines in these commands didn't work cleanly for me the first time. But they did if I used the magic word "sudo" at the start of the line.sudo apt-get update
sudo apt-get install build-essential
wget 'http://snapshots.madwifi.org/special/madwifi-ng-r3366+ar5007.tar.gz'
tar zxvf madwifi-ng-r3366+ar5007.tar.gz
cd madwifi-ng-r3366+ar5007
make clean
make
sudo make install
sudo reboot
Important: As it says on the page, an update to the kernel will cause you to lose your wifi, and you'll have to run this again. Probably a good idea to keep these commands handy.
Edit 13/07/2008: Anonymous has pointed out that you don't need the "sudo reboot" line at the end. Thanks Anon:
"Hey, just a quick FYI:
In step 6A, you don't need to sudo reboot, the same can be achieved by loading the driver into the ruing kernel with sudo modprobe ath_pci"
7. Run Ubuntueeetweak
At the wiki entry for an Ubuntu 8.04 installation page that I showed you before, there are two scripts that can be run to get most stuff up and running, including the problematic stuff such as sound, wifi, etc.I ran both of them.
Download this file to your desktop: ubuntueeetweak.sh
Then, open a terminal and run this command, replacing "username" with your user name:
You will then need to reboot:sudo sh /home/username/Desktop/ubuntueeetweak.sh
You may need to run this script again in the future if you lose functionality - this normally happens after a kernel update.sudo reboot
8. Run RiceeeyTweak
I did this, although it may be optional.Same as in 6, download this file to your desktop: RiceeeyTweak.sh
Then follow the same steps as running ubuntueeetweak except for the file name. This will do much the same as above, and install an overclocking facility. I doubt that I'll ever use that.
9. Fix the sound
You will not have sound just yet.You will need to add a line to a file in Mousepad. In your terminal, run:
Add this line to the file (but only for the Eee PC 90x):sudo mousepad/etc/modprobe.d/snd-hda-intel
For an Eee PC 70x, this line should be:options snd-hda-intel model=auto
Then save and close. Then reboot.options snd-hda-intel model=3stack-dig
You should finally check all these:
- Right click on the task bar at the bottom of the screen.
- Press “Add New Item”
- Scroll down until you find the Volume Control applet and drag it to the panel next to the applications button. (Drag anything else you want down at this time too.)
- Then right-click on the new Volume Control icon and go the “Properties”.
For “Wannabe Master”, choose “Front,0” (which is responsible for main sound output).
Leave the “xfce4-mixer” in the “when clicked” box alone. – that's what we're running.
- If you click on the icon, it brings up the mixer where you can adjust front speaker and mic volume. Ensure that 'Headphone' is selected. If Headphone is not available, click on 'Show Switches' to reveal it.
- If you click the volume meter to the right of the panel icon it will adjust the volume up and down.
I haven't tried out the webcam or the mic yet. It might be a little while, but that should get you going - remember, most of everything else that you need to run stuff on EeeXubuntu on your Eee PC 900 is available here. And if it's not there, then try here.
One of the things that I'd like to do is to try out plugging it into a separate monitor. Given the sheer portability of this thing, I like the idea of using it on trips away and plugging it into projectors in place of a regular laptop. I'll get around to doing that eventually.
What else?
- It performs OK. It's presently underpowered, but the Atom processor in the Eee PC 901 and forthcoming Eee PC 1000 may fix this.
- It boots up in 74 seconds. Apparently this should be under a minute, but the upgrading and updating will weigh it down. I think that under a minute and a half is OK - I'll need to look into fixing it if it takes longer than this.
- It's portable. Ridiculously portable.
- Wireless works after all this, but it's painful having to run scripts every time the kernel updates. This might be fixed in a future EeeXubuntu release.
- Some are reticent of tossing the Xandros install for fear of losing Skype. This script apparently fixes this. I haven't tried it out yet.
- I can't seem to get some of the windows to adjust to the desktop space, heightwise. Hopefully a fix is not too far away.
I might do another one in the future on my Eee PC down the track - I'm still very pleased with it to date.